Each girl wants to have several wallets in the assortment at once, which could be picked up for a certain bag or wardrobe.
Such things are usually made of leather or suede, and in stores there are many.
However, buying a new wallet is very expensive for many.
Therefore, it is easier to make a wallet with your own hands from improvised materials.
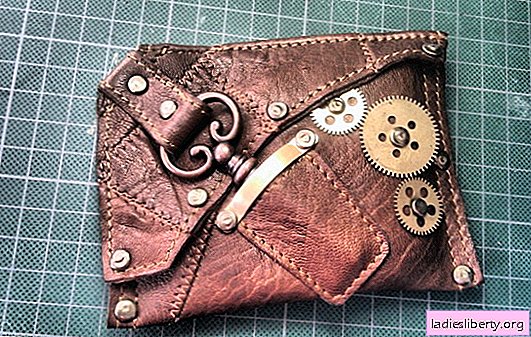
Many needlewomen create not just wallets, but a real work of art, some prefer classic rectangular leather goods, while others opt for retro-style accessories. Wallets in the form of cute little animals or with a clasp look especially original.
If you decide to make a beautiful wallet with your own hands, we suggest that you familiarize yourself with our master class, which involves creating a classic wallet made of fabric. However, following the step-by-step instructions below, you can show your imagination and add your own twist to the finished product. What kind of zest will it be - you decide, maybe you will add a variety of rhinestones, staves or homemade butterflies to your wallet. However, it takes no more than half an hour to create such a simple wallet.
Do-it-yourself wallet: what materials you need
First you need to prepare all the necessary materials. Any textured fabric, rather than leather or suede, is easiest to pattern. Therefore, in advance, prepare the most favorite piece of fabric in color. In this case, we took linen for the exterior and cotton for the inside. You will also need thickened material to create a pocket for bank cards, for example, you can take overcoat fabric in black or any other color.
In addition to the basic materials, you will need durable threads, a needle, scissors, a sewing machine, a marker or a crayon, and of course a clasp. As the last one, you can buy a magnetic button in a specialized store with which you can fasten the future product. By the way, if you do not want to sew a wallet with your own hands from ordinary dense fabric, you can take material such as felt instead. This is a very tough material and you need to choose the appropriate sewing needle for it.
However, this master class involves the use of two fabrics of different colors for a more aesthetic appearance of the accessory, and a small piece of overcoat fabric. So, we offer you to sew a wallet with your own hands, in which there will be several pockets. One pocket will be used to store small things, two smaller pockets will be used to store bank cards.
DIY wallet: step-by-step instructions
First thing you need make a pattern for the future product. You will need to carve out two parts at once - one from flax, the other from cotton. But the pattern itself should consist of four parts: the main pocket, a compartment for cards, a pocket for storing little things and a fastener. To sew the main pocket, you need to cut a rectangle, cut 4 pieces of linen and cotton into a rectangle, that is, two of each material. The dimensions of the parts should be as follows: length 21 cm, width 10 cm.
Next you need to do blanks to create future pockets for business cards and cards. To do this, cut out two pieces of overcoat fabric with a size of 10x5.5 cm. If the cut edges of the blanks are easy to climb around, it is better to cut out the details a little larger, with about one centimeter allowance, so that there is a margin for the turn. Next, make blanks for a pocket for a trifle, for this, from each type of fabric, cut one piece with dimensions of 10x9 cm.
Do not forget about the piece of fabric on which the fastener will then be attached. From both types of fabrics (linen and cotton), cut a piece of rectangular shape, at which the edges should be rounded at one end. A length of 2 cm wide will be enough, determine the length when the wallet with your own hands will be almost completed. In total, you must have all the necessary details ready, as shown in the photo below.

On one piece of linen fabric that will be used for sewing the main pocket, with a basting seam, determine the area where the pockets for bank cards and trifles will be sewn. Then prepare two pieces of fabric, which are meant for sewing a pocket for small things, fold them in two with their sides inward and sew along the edges, starting from one corner and ending with the other. How exactly this should happen, see the photo.

♥♥♥

♥♥♥

♥♥♥

Then turn the resulting pocket for the little things on the front side, iron and sew Velcro along the entire length of the product. Sew the second part of the Velcro to the part of the main pocket on the left, that is, where it is supposed to fix the pocket under a trifle. On the right side of the main department, where you determined the place for bank cards, stitch two pieces of overcoat fabric.

At this stage, the most difficult work will be completed. It remains to draw up the main department, and the do-it-yourself wallet is almost ready. Attach a pocket under a trifle on a flypaper sewn to the main department of a product. It is also necessary to prepare a section for the fastener. To do this, fold the two parts together with their faces inward and sew along the edges, do not forget to leave one end of the received part without a seam. Then turn out and smooth with an iron. Sew one end of the part to the side of the wallet’s main compartment and attach the fastener to the other end of the part.

♥♥♥

♥♥♥

Take two rectangular pieces for the main compartment of cotton fabric and sew along the edges, leaving one edge without a seam so that you can put something in the finished pocket. Next, put the part into the department of linen fabric, fold the edges and sew on the machine. If you are afraid that the money that will be stored in the main pocket will fall out, you can also sew a zipper tape to the edges. On this, all your work will be finished, and the wallet is ready for operation.

♥♥♥