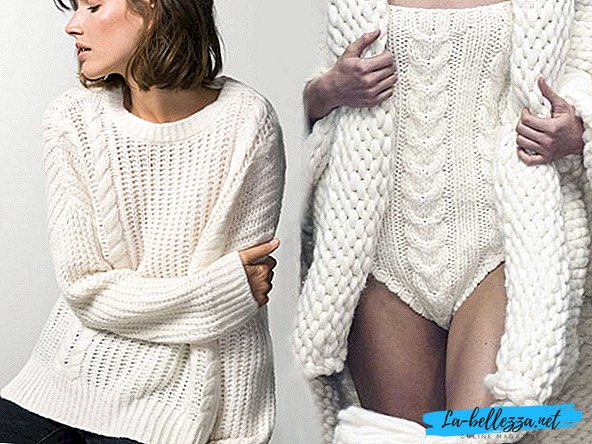
Braids are always a great idea for any knit-knit product: they are universal because they are suitable for children, women and men; There are a huge number of varieties - there is always a choice to choose from; braids and harnesses look wonderful on most models of knitted items, be it hats, sweaters, scarves, cardigans, snoods, mittens, sweaters, dresses, booties, vests, pants, and much more.
Using diagrams with descriptions of knitted braids, it is almost always possible to relate not just another thing, but a unique author's product of its kind, from which not only the craftswoman will be thrilled, but everything around.
How to knit braids with needles - schemes and description of patterns

It should be noted that there is a specific work, which you should definitely get acquainted with before knitting. So, how to knit with braids? For thisAuxiliary needles are neededthat come in different sizes. Their thickness should be selected according to a simple principle: auxiliary needles should be slightly smaller than the workers.
What is the principle of braids knitting needles? The hinges are constantly moving during operation. Several loops are transferred to the auxiliary needle, leaving them behind or in front of the work, after which, in accordance with the chosen scheme, a certain number of loops are knitted, and then put back to work laid back on the auxiliary needle of the loop.
To make it clear by what principle the braids are knitted, let's consider several options for working with knitting needles in this style, including for beginner needlewomen.
Simple braid - a master class for beginners
To understand the basics of knitting braid knitting needles, consider the most simple option, ideal for beginners. This MK knitting braid suggests that the auxiliary knitting needles are replaced with a simple pin, which is extremely convenient if you have not got the right tools yet.
How to knit pigtail knitting - master class for beginners

Make a braid on 8 loops. We will dial 14 loops for the sample (12 loops for the braid and its “frame” + 2 edge loops) and follow the pattern.
1st row: 2 purl, 8 face, 2 purl;
From 2nd to 4th row we knit what a binding looks like - we knit facial over the facial, and purl loops above the purl (photo 1).
5th row:2 purl, 4 loops re-shoot, not tying them, on the auxiliary knitting needle and leave work ahead; to knit the next 4 loops with facial ones (at the beginning of their knitting, try not to have a big broach between the loops). Then 4 loops with the auxiliary needles are relocated to the left needle and also knit them with the front ones. It turned out that the loops, as it were, were crossed with a tilt to the left side (photos 2 and 3).
From the 6th to the 12th row - knit by drawing.
Next, knit repeating from the 5th row. The result is such a scythe (photo 4).
Now let's look at more complex knitted braids with needles - schemes with a description will help in this difficult task for beginners.
Beautiful volume pattern

A volumetric braid with needles will make any thing special, and will definitely add a little romance to the image. Just one three-dimensional pattern is enough, like, for example, this wonderful braid, and the thing already acquires a unique look.
The diagram shows the front and back rows. The width of the motive is 40 loops, in height we repeat from the 1st to the 32nd row.
Braid knitting scheme and designations:

 - purl (purl - in the front rows, front - in the purl)
 - facial (facial in facial rows, purl - in purl).
 - Cross the 4 loops to the left (remove the 3rd loops on the auxiliary knitting needle and leave before work, 1 knit the knot in the wrong loop, then the 3rd loop with a personal knitting needle).
 - Cross the 4 loops to the right (remove 1 loop on the auxiliary knitting needle and leave it at work, knit 3 loops with the front loops, then knit 1 loop with auxiliary knitting needle).
 - Cross the 5 loops to the right (remove 2 loops on the auxiliary knitting needle and leave it at work, knit 3 loops with the front loops, then knit 2 loops with auxiliary knots with the wrong side).
 - cross the 5 loops to the left (remove the 3rd loops on the auxiliary knitting needle and leave before work, knit the 2 loops with the wrong side, then the 3rd loops with the auxiliary knitting needles face).
 - cross the 5 loops to the left (remove 3 loops on the auxiliary knitting needle and leave before work, knit 2 loops with the front loops, then 3 loops with the front loops on the knitting needles).
 - cross the 5 faces to the right (leave 2 loops on the auxiliary spoke at work, knit 3 faces, then 2 loops with auxiliary spokes on the front.
 - cross the 4 loops to the left (remove the 2nd loops on the second knitting needle and leavebefore work, 2 loops knit facial, then 2 loops with aux. spokes facial).
 - cross the 4 loops to the right (remove 2 loops on the auxiliary knitting needle and leaveat work, 2nd loops knit facial, then 2 loops with aux. knitting needles knitting facial).
 - cross the 4 loops to the left (remove 2 loops on the auxiliary knitting needle and leavebefore work,2 following knit purl, then 2nd loop with auxiliary. spokes facial).
 - cross the 4 loops to the right (remove 2 loops on the auxiliary knitting needle and leaveat work, 2nd loops knit facial, then 2 loops with aux. knit needles knit purl).
 - cross the 5 loops to the left (remove the loops on the auxiliary knitting needle and leave before work, knit 3 loops with the front loops, then 2 loops with the front loops of the spokes).
 - cross the 5 faces to the right (leave 3 loops on the auxiliary spoke at work, knit 2 faces, then 3 loops with auxiliary spokes on the front).
Cap pattern

The Spit pattern for the cap is the permanent classic of winter fashion. For a harmonious set, the braid often knits also on scarves or cords, as well as on mittens - this makes the image complete. Well, for demi-season and winter hats useful such a simple scheme of knitting braids with needles with a description.
Scheme and designations:

 - purl loop.
 - front loop.
 - remove the double crochet.
 - provyazyvanie two loops together front.
Braid for men's sweater

The image of a sensual man in the cold season is perfectly complemented by a warm knitted sweater with braids - proved by many romantic comedies! Therefore, it's time to tie a beautiful thing to a dear person.
This braid with knitting needles for a men's sweater also knits with the help of additional knitting needles.
Working process:
The needles dial the number of loops, divisible by 11 plus 2 loops for the symmetry of the pattern, plus 2 edge loops.
1,3,7,9 rows: * 2 purl, 9 facial *, 2 purl;
2 and all even rows: 2 facial, * 9 purl, 2 facial *;
5 row: * 2 purl, 3,4,5 loops are removed forwards on an additional knitting needle, they knit 6,7,8 loops, then 3,4,5 th loops with facial loops, 3 loops with facial loops, 2 purses;
11 row: * 2 purl, 3 facial, 6,7,8 loops are removed back on an additional knitting needle, knit 9,10,11 loops, and then 6,7,8 th loops with additional knitting needles facial *, 2 purl.
Next, knitting a braid pattern is repeated from the first row, acting according to the following scheme.

What to choose for a female cardigan?

A braid for a female cardigan may look different: large, small, repetitive, combined with other braids or in a single copy, but it will always give the knitted thing an original look.
Scheme knitting needles and symbols:

 - facial (facial - in the front rows, purl - in the purl).
 - cross the 10 loops to the left (remove 5 loops on the auxiliary knitting needle and leave before work, 5 following loops knit facial, then 5 loops with aux. spokes facial).
 - cross the 10 loops to the right (remove 5 loops on the auxiliary knitting needle and leave at work, the next 5 loops knit facial, then 5 loops with auxiliary. knitting needles knitting facial).
Both facial and purl rows are shown in the diagram. We read the front (odd rows) from right to left, the purl (even rows) read from left to right.
Spit width - 20 loops. We repeat the height from the 1st to the 12th row. The number of rows in the scheme in height can be increased, depending on the desired pattern.
In the classic version, if we weave 5X5 braids, then between the weaves we knit 10 rows in height (including the front and back ones). Here in this model, the number of rows in the scheme should be increased in height to 16 rows.
Pattern for mittens

Good mood and warmth this winter will create mittens with needles from braids that you can tie yourself, sister, girlfriend, mother.
This knitting option can be difficult for newbies., as mittens need to knit with five stocking knitting needles.
Working process:
We collect 52 loops - 13 loops for one needle. Gum knit 2x2, approximately 40 rows. We follow the scheme and description in order to understand how to knit braids on mittens.
We put our finger on the 10th row. On the side of the small braids, add to the two middle loops - 3 times in the second row. Then in the third row 3 times. When it becomes 18 loops, throw them on a pin and continue to knit a mitten. Finger can be linked later. It fits just like the mitten itself, only in a smaller size.
This is followed by double knitting, in the first row on the knitting needles we knit alternately one facial loop and two facial loops together. In the second row of facial loops, two loops together and so on until the end of the row. All remaining loops pull off.
Scheme and designations:


What pattern is suitable for a children's pullover?

Children's knitting pullover can also be decorated with a beautiful motif of braids. It will be very useful for winter products, adding its own flavor when creating a sweater for a child. Let's take as a basis the central braid.

In the scheme according to which we will knit a braid, only the front rows are shown. In purl knit by pattern. The motive width is 36 loops. We repeat the height from the 1st to the 20th row.
Scheme and explanation:

 - purl (purl - in the front rows, front - in the purl).
 - facial (facial - in the front rows, purl - in the purl).
 - Cross the 3 loops to the right (remove 1 loop on the auxiliary knitting needle and leave it at work, knit the 2nd loops with the front ones, then knit the loop with auxiliary knitting needles on the front one).
 - Cross the 3 loops to the left (remove the 2nd loops on the auxiliary knitting needle and leave before work, knit the first loop with the front one, then knit the 2nd loop with auxiliary knitting needles with the front ones).
 - Cross the 3 loops to the right (remove 1 loop on the auxiliary knitting needle and leave it at work, knit the 2nd loops with the front ones, then knit the loop with auxiliary knitting needle).
 - Cross the 3 loops to the left (remove the 2nd loops on the auxiliary knitting needle and leave before work, 1 knit the loop with a purl, then the 2nd loop with auxiliary knitting needles).
 - Cross the 4 loops to the left (remove the 2nd loops on the auxiliary knitting needle and leave before work, knit 2 loops with the front loops, then the 2nd loops with auxiliary spokes of the loops).
 - Cross the 4 loops to the right (remove 2 loops on the auxiliary knitting needle and leave at work, knit 2 loops with the front loops, then knit 2 loops with auxiliary knitting needles with the front loops).
 - cross the 4 loops to the left (remove 2 loops on the auxiliary knitting needle and leave before work, tie the 2 next ones with the purl, then the 2 loops with the auxiliary knitting needles of the front ones).
 - Cross the 4 loops to the right (remove 2 loops on the auxiliary knitting needle and leave it at work, knit 2 loops with the front loops, then knit 2 loops with auxiliary knots with the wrong side).
 - Cross the 2 loops to the left (remove 1 loop on the auxiliary knitting needle and leave before work, knit the 2nd loop with the front one, then knit the 1 loop with the auxiliary knitting needle).
Pattern for a plaid

To tie the blanket with knitting needles from braids is a real challenge for the needlewoman, because this work takes a lot of time and requires a lot of effort and patience, but the result will please the whole family for many years! What do you need to do to link the future favorite blanket of the family? The answer is simple: an unpretentious braid pattern that will give a coziness to a knitted knit.
Knit braid for rug:
The volumetric braid consists of 12 loops. Rapport pattern in height is 8 rows. Rows from 1st to 8th form a pattern. In every 4th row the overlap of the braids loops alternately.

Working process:
1st and 5th rows: * 9 out. P. 12 persons. n., 9 out. n. *, repeat from * to *;
2nd and all even rows: all loops knit by pattern;
4th row: * 9 out. cross paragraph to cross paragraph to the left (4 paragraph to leave on the auxiliary spoke before work, 4 faces. paragraph, then fasten with the face 4 paragraph with the auxiliary needle), 9 out. n. *, repeat from * to *;
8th row: * 9 out. p., 4 persons. cross paragraph to cross paragraph to the right (4 point to leave on the auxiliary spoke at work, 4 face. p., then knit 4 faces on the side of the auxiliary needle), 9 out. p., *, repeat from * to *.
Repeat the pattern, starting from the 1st row, to the desired height of the braid.
Video lesson
If the photo of schemes and products with braids connected with knitting needles turned out to be insufficiently clear, a video lesson on knitting a volumetric braid with needles will help to understand some important points.


